Level:
Goals:
Second Life is a fairly old platform, and as such it faced many challenges with respect to embracing a variety of hardware, most of it less than capable when it comes to graphics performance. Consequently, many choices were made that optimized for both low performance requirements (relatively speaking), and simplicity in the toolset, which was entirely self-containted in it's original form.
Unity, in contrast, exposes the full spectrum of hardware capabilites to the creator in the editor interface. Additionally, every opportunity has been made to keep Unity highly performant at the 'point of sale'.
There are consequences in each of these platform design choices. Like the differences in platforms, the differences in consequences are significant.
For Second Life, keeping things very simple and spreading the resources around the application was paramount. The success of this model is obvious; it's a horse many of us get on and ride with satisfaction and utility to this day. Unity, however, is a stealth jet. Piloting skills are required.
So what does all this have to do with texture animation? Well, only a lot. The objects produced by and for Second Life users are made up in-situ, out of object components that are mathmatical abstractions of models. As such, they have some fairly unique properties. As with anything unique, it sets all else apart. Unity, however, directly employs modelled assets freely available to the video gaming marketplace; or that are produced using the same industry standard tools as these models. It is a gaming engine, not a modelling/animation suite. 3DSMax, Maya, Cheetah3D, Blender, the list goes on; all of these, with notable exceptions, focus on being modelling or animation tools. Chances are, if it can export an FBX or OBJ filetype, it can be used to produce models for Unity. This leaves Unity with substantially more resources to bring to bear upon delivering a strong game engine.
Let's cut to the chase: can we animate the faces of objects with textures in Unity, as we do in Second Life? The short answer is no. Not even a little. That doesn't mean the same effect can't be achieved; it simply means that the method by which it is acheived may seem quite foreign when first encountered.
Just remember, when in Rome, do stuff like the Romans do.
One quick note: It has become possible in the past few years to upload fully modelled mesh content to Second Life. We're not going to worry about that too much, except to say that making content for Unity is lagely identical to making mesh content for SL, so if you know anything about that, you have an idea of the nature and scope of the task.
It is perhaps useful to imagine that there is a nature about all this. natural in this context means that there are certain operations performed by modern graphics hardware; these operations being performed by special programs called 'shaders'. Without getting too over the top, shaders do some very specific things in some highly optimized ways. This nature is exposed directly in the Unity editor interface. In this way of thinking, SL is a bit unnatural. It provides some very limited functionality using shaders that it keeps quietly hidden away. This is because shaders are made to work on models, and Second Life content is not modelled as such; it's built up of a variation, an arithmetic shortcut called 'primitives'. Beyond that I wont waste time on a discussion of that technology; we're acutely aware of how that all works.
In SL there is (potentially) a texture per face. In Unity, there are objects, and they are skinned with materials. Pay close attention: the material is applied per object, not per face. If you wish to have an object that has different textures exposed on a per-face basis, then it needs to be a complex object, with child objects that provide the illusion of distinct faces. This does not mean a simple object cant have multiple faces; it does mean however, that all the faces in a simple atomic object will share the same material.
In SL too the approach to animating the textures on the faces of prims is quite different. Via one or two functions, certain pre-supposed effects are exposed in their calling parameters for setting the scale, rotation, and position, and various 'effects' like loop, pingpong, direction, and speed.
With Unity, as mentioned before, materials are used. A Unity material is one or more textures, used in various ways by a shader and some parameters based on the operation performed by the shader. The shader runs right on the graphics hardware, and does what shaders do (render a pixel). Like just about everything else in Unity, materials can be animated. Every property exposed in the inspector (and often some that arent thusly exposed) can be animated with the animator. The animator produces 'animation clips', which are collections of scene graphs. A scene graph is the set of all datapoints for a given parameter over the course of a period of time. If a lit pixel is moved across the screen horizontally, it's scene graph is the increasing value over time of it's 'X' screen coordinate. That value for 'X' can be plotted on a graph vs. elapsed time, hence the name scene graph. In Unity, a collection of such scene graphs is collected into a little proprietary bundle per-object called an animation clip.
You can get into the animation editor for an object in at least two ways. One, select the object either in the scene or in the hierarchy, and press CTRL 6. The other is from the main menu, 'Window->Animator'.
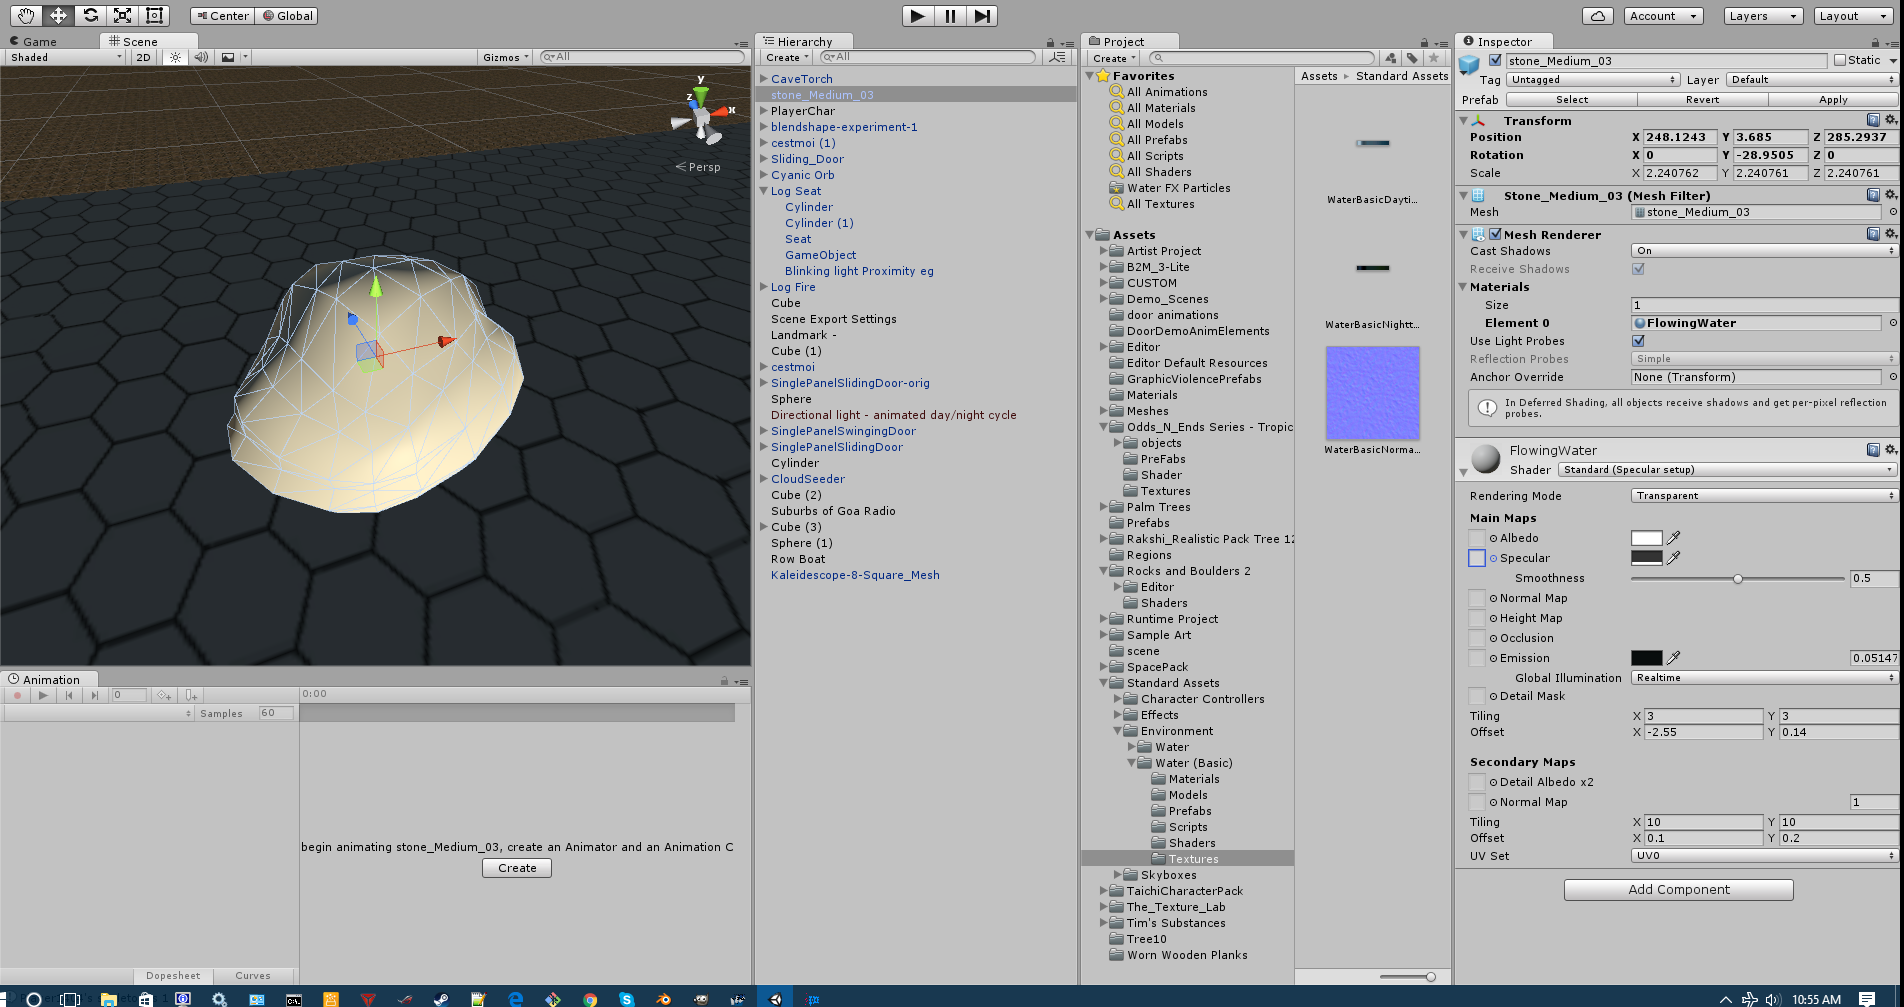
You should see something like this:

|
|---|
| Fig. 1: Ready to work on some water flowing over a stone |
The first thing to do is create a new material. Select your assets folder in your Projects window/tab. Then from the main menu, 'Assets->Create->Material'. Give the new material a new name, like 'FlowingWater'. Next you're going to need a nice image of some water, evenly lit. Import that from the main menu, 'Assets->Import New Asset' and pick your file. For the purposes of this tutorial, I just snagged one off google images. Seamless is pretty important if you want it to look right ;)
Make certain the new material is selected in your project window/tab, and scroll down to the material in the inspector. Note the dropdown picker for 'Shader'. Find the one that is called 'Standard (Specular setup)', and below that set Render Mode to 'Transparent'. Skipping down to 'Main Maps', Find the little sqaure with the little circle beside it labelled 'Albedo'. Click the little circle, and pick your recently imported water surface asset (2DTexture). Set it's tint to a pleasant shade of green, preferably one close to something presnt in your water image. Set a specular color too. Adjust the smoothness slider to get that ideal balance between shininess and transparency. If you have one, use a water normal map asset (2DTexture). It doesn't much matter whether it matches the water texture you're using, though it should be tileable. I used a normal map that I had laying around from another project. It will improve the appearance of my water, but it would work fine without it, and might not be at all appropriate if you aren't animating water. We wont be introducing a specular map in this little assembly.
Scrolling down beyond Global Illumination, find 'Tiling' and 'Offset'. If these sound familiar to you, you are correct, and they do much what you would expect them to do. These are also what we'll be animating.
It should be noted at this point that while it doesn't impact this workflow, there is no parameter exposed for doing rotation in this material. This is because this shader does not do rotation. There are shaders that do, and it is likely that when one such is used, it's rotation properties would be exposed in a similar material parameters inspector window.
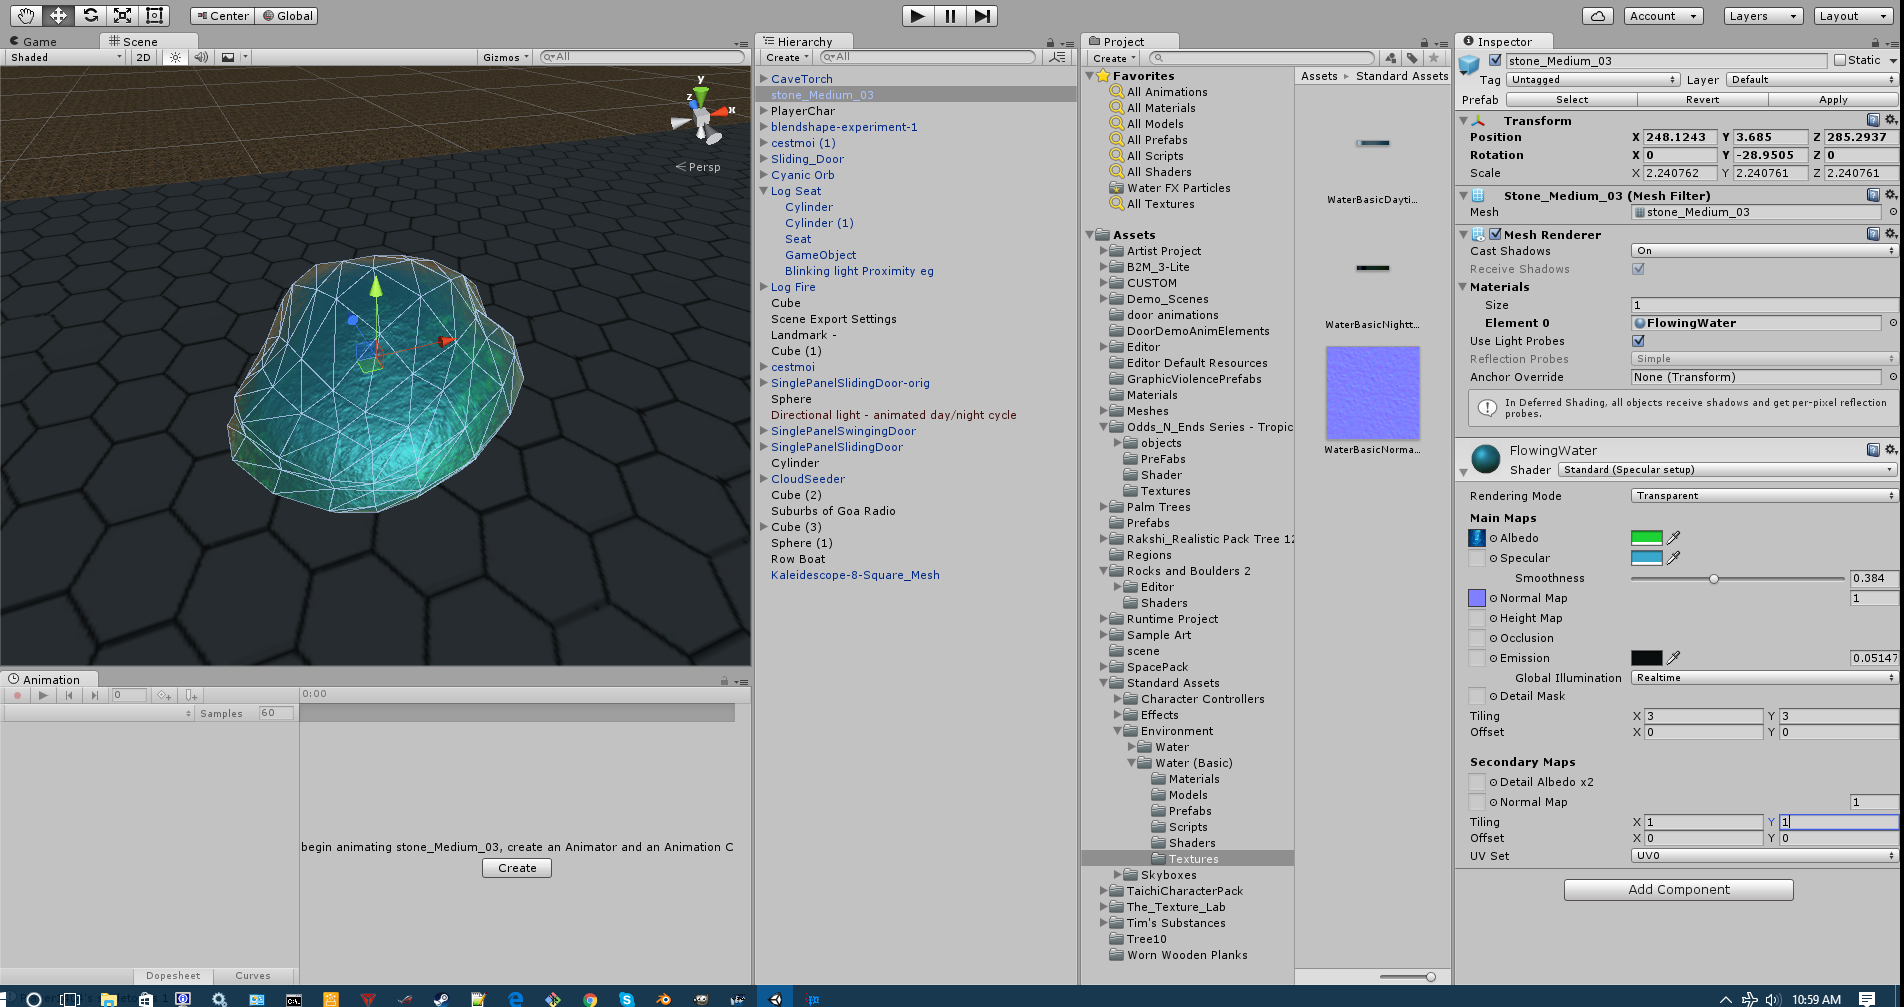
If you are playing along in the editor, you should have something more or less like this:

|
|---|
| Fig. 2: Stone shaped mesh object skinned with flowing water material (yet to be animated) |
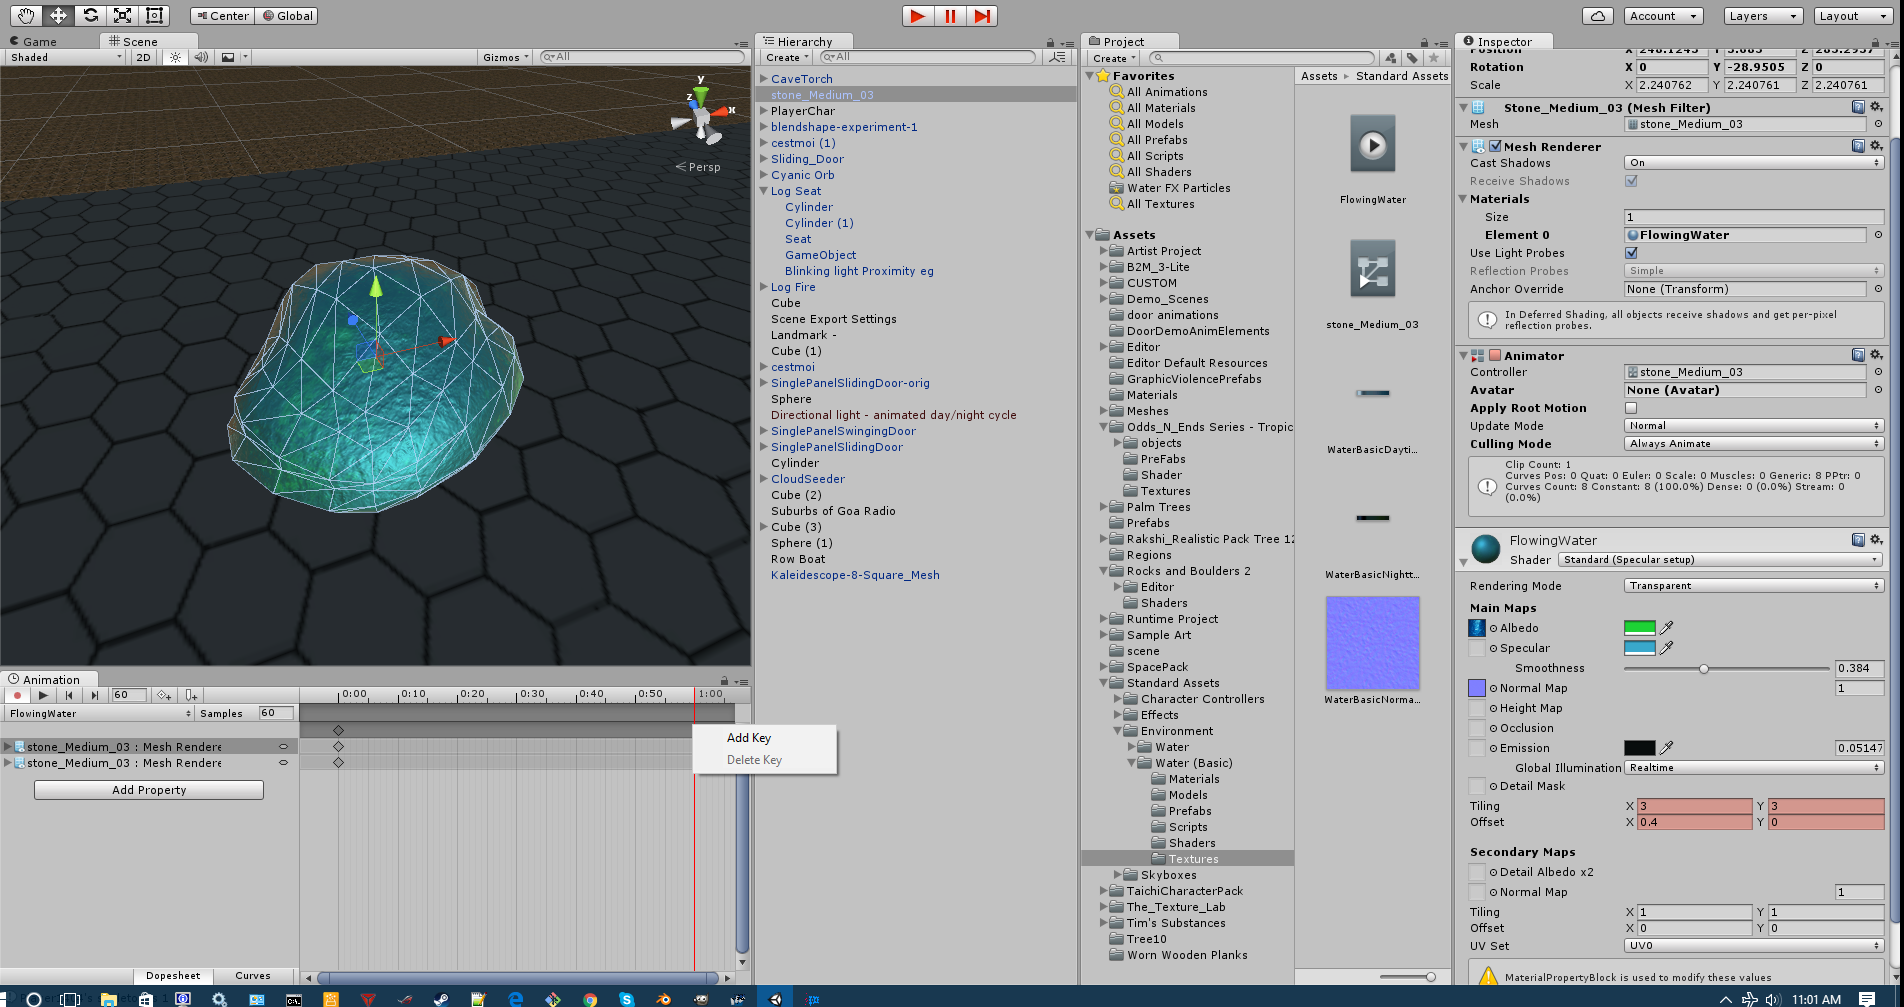
Now it's time for the animation. Click the 'Create' button in the center of the animator window and create a new animation file. Give the animation a good name like 'FlowingWater' or something ;) Next right-click on the dark grey rectangle to the left of the upper scrolling arrow where it intersects the red line. Click the 'Add Key' Selection in the popup. Next, click right on the timeline at 1:00. This should move your scene graph cursor (the red line). Repeat the addition of the keys:

|
|---|
| Fig. 3: Setting up the material animation |
| |||||
| |||||||||||||||||
| ||||||||||||||||||||||||||||||||||||||
| |||||||||||