The clothing item setting component is used whenever you want to upload clothing to the sinespace shop.
The clothing item setting component is split into different sub catergories. Each sub-catergory has different settings for the clothing and the uploading of the item.
When you have imported your clothing item into Unity, make sure it is selected, and go to the Inspector window and click on ‘Add Component’ and search for Clothing to add the Clothing Item Settings component to your clothing item.

As you can see in the above image, there are four main catergories: Item, Customisation, Submission and Review; Under each of these main categories are sub-categories.
Item
Item is where you can change the skeleton of the avatar to match the clothing you are uploading, and you will also see a list of categories to choose from. The list of categories is:
- Clothing
- Costumes
- Skin Material
- Tattoos and Makeup
- Shapes
- Animations and Controllers
Underneath is an explanation for all of these categories and their sub-categories.
Clothing
There are six sub-categories of clothing settings under the clothing category. These categories are:
- Fitting and Slots
- Skin and Cloth Deletion
- Materials and Patterns
- Level of Detail
- Automatic Skin Weighting
- Feet Settings
At the top of the clothing settings, you can change the type of clothing you are uploading. The types are Rigged Clothing and Attachments.

Fitting and Slots
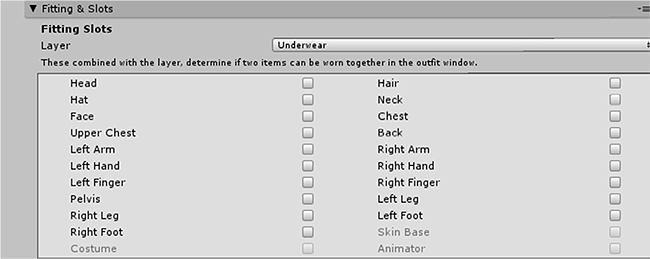
Fitting and slots is where you will find all the settings for the fit of the clothing and the clothing slots.
- Layer - This is where you can choose the layer of your clothing. For example, underwear would be under the Underwear layer, and a coat would be under the Baggy and Outerwear layer. If you set your clothing as Underwear layer, it means other clothing can go over them. If you set your item as baggy and outerwear, it means that other items of clothing can be worn under it. For a guide on layers, please see this layers page.
- Fitting Slots - The avatar slots are where the skeleton will be deleted under the clothing. If you have a t-shirt for example, and don’t want it to be worn with other items, you will have to check the upper chest, chest and back slots.
Skin and Clothing Deletion
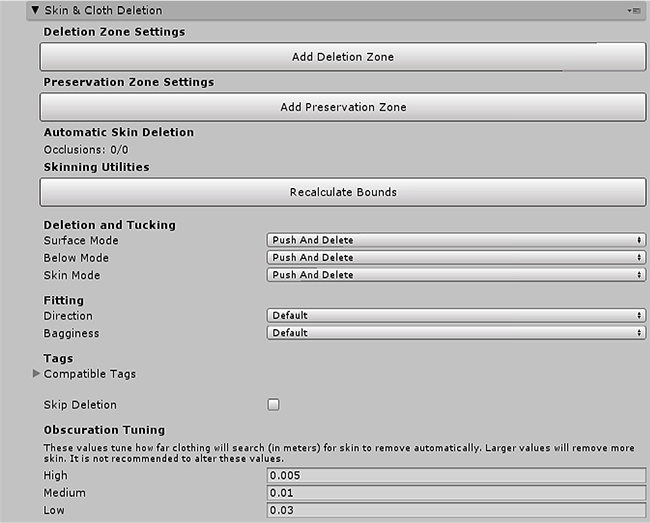
This is where you can add deletion zones, preservation zones, recalculate bounds and also change the settings for deletion and tucking, fitting and obscuration tuning.
- Deletion Zone Settings - The deletion zones are used for selecting an area of the avatar which you want to be deleted under clothing. This can be used for certain types of clothing which need a little extra deletion underneath.
- Preservation Zone Settings - Preservation zones are used for selecting an area of the avatar which you want to keep under clothing. This is useful if you have clothing with holes in, e.g, a dress with a slit or a corset with a lace-up back.
- Deletion and Tucking - There are three options for deleting and tucking. You can choose to push and delete, which will push one mesh slightly into another, and delete the underneath mesh. This is useful if you are making a shirt and trouser combo where the shirt is tucked into the trousers. The Push only option will push the top mesh into the underneath mesh, but not delete the underneath mesh. And finally, you can choose to ignore this all together if you don’t want to use this setting.
- Fitting - Direction sets the direction of the fit of clothing. This is used if the clothing is the wrong way round.Bagginess sets the bagginess of the clothing. There is tight, loose and baggy to choose from.The Skip Deletion check box when ticked will skip the deletion process of the skin of the avatar underneath the clothing.
- Obscuration Tuning - These values tune how far clothing will search (in meters) for skin to remove automatically. Larger values will remove more skin. It is not recommended to alter these values.
Materials and Patterns

Materials is where you can set to keep the material always of the clothing or attachment. If you plan to use the pattern system which allows for color and texture variations, leave the ‘Keep Materials Always’ unticked.
Level of Detail

This is where you can add in the high, medium and low LOD objects of the clothing. If you do not add any, we will set it to medium by default.
Automatic Skin Weighting
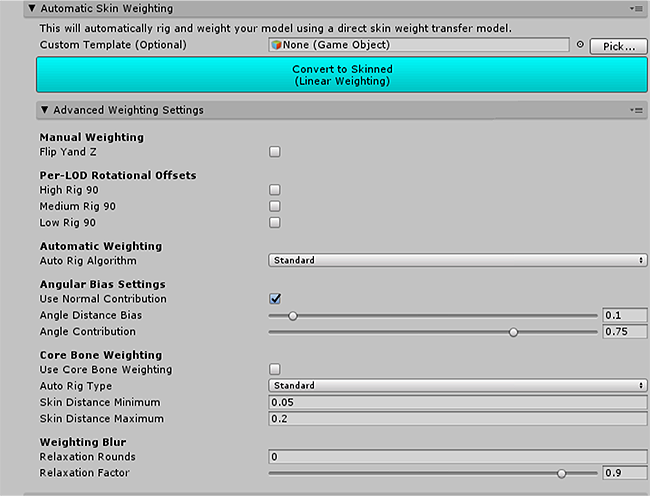
This is where you will find the settings needed for auto-weighting the clothing.
- Automatic Skin Weighting - This will automatically do the skin weighting for you without you having to do anything manually when you press the button. You can also add in a Custom Template here. This custom template is used if you have manually rigged and weighted clothes to a model in 3D software. You will need to drag the model into the Custom Template box.
- Advanced Weighting Settings - You can change settings for weighting here for better outcomes manually under the advanced weighting settings.
Feet Settings
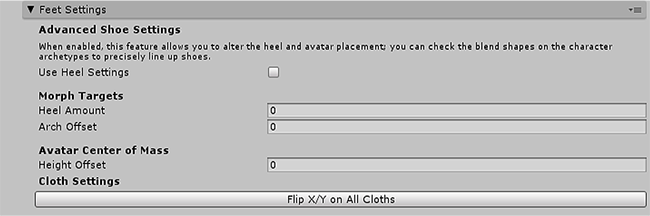
When the 'Use Heel Settings' is ticked, you can alter the heel and avatar placement. You can check the blend shapes on the character archetypes to precisely line up shoes.
Morph Targets is where you enter the data for the Heel Amount, Arch Offset, and Height Offset.
Here is more information on how to set up shoes with heels.
Costume

This is where you can add the options for a full body replacement costume.
- Referenced Prefab - This is where the root template of your costume will be. You will need to drag the costume into the Root Template box. For example, if you have a self-made avatar you want to use in sinespace, you will need to drag this avatar game object into this box.
- LOD Variants - This is where you can drag the low and high poly variants of your costume/avatar.
Skin Material
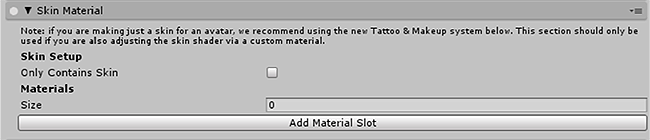
This section should only be used if you are adjusting the skin shader with a custom material. If you are just making a skin, we recommend using the tattoo and makeup system.
Tattoos and Makeup
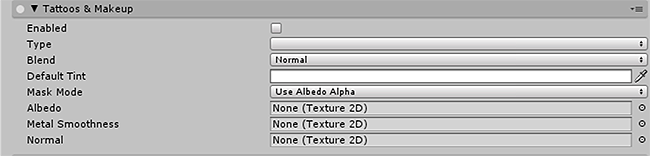
This is where you can add tattoos, make up e.t.c as layers.
- Enabled - Check this box to enable the layers.
- Type - Here you can choose from different types of layers. Overlay will be an overlay layer, Tattoo will be for a tattoo, Make up is for make up, Skin is for a skin overlay layer, and Base Skin layer will replace the original avatar skin.
- Blend - You can choose from a range of blend options here such as darken or soft light, they work a bit like layer masks.
- Default Tint - This is the default tint of the layer. If you want a black tattoo for example, you can set the default tint to black.
- Mask Mode - You have two options here, you can choose Use Albedo Alpha, or Use Albedo Alpha ignoring Albedo.
- Albedo - This is where you drag the texture for the albedo.
- Metal Smoothness - This is where you drag the texture for the metal smoothness.
- Normal - This is where you drag the texture for the normal map.
Shapes
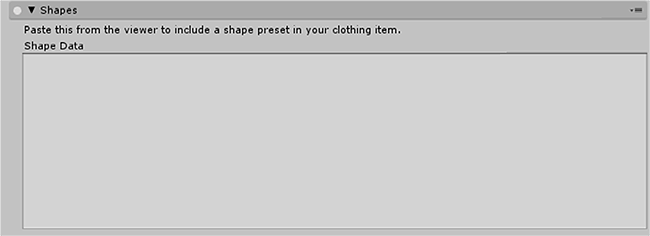
This is where you can paste the shape data from the client to add a shape preset to your clothing.
Animation
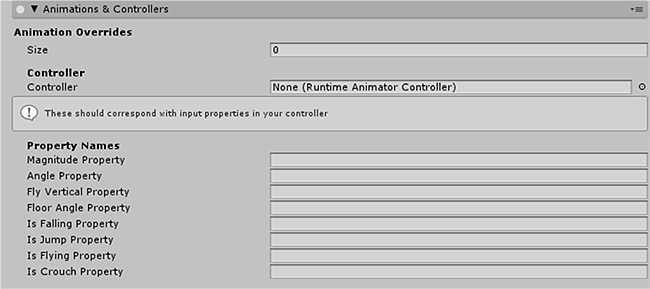
This is where you add the information from your animation controller.
- Animation Overrides - This is where you will state the number of animation overrides, then add the element slot and humanoid animation clip.
- Controller - This is where you drag in your animation controller.
- Property Names - These properties should match the property values in the animation controller.
Customisation
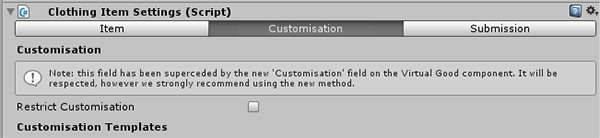
Note - This field has been replaced by the new ‘Customisation’ field on the Virtual Good component. It is recommended to use that customisation field, but this method will also work.
- Restrict Customisation - If this is ticked, it will restrict customisation of the clothing from other users/creators.
Submission
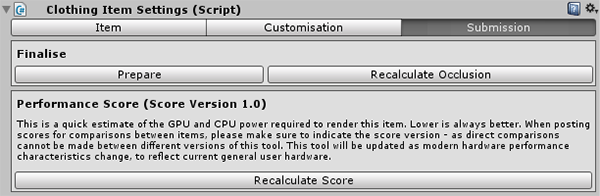
This is where the final settings for uploading the clothing item are.
- Finalise - You can either click on ‘Prepare’ to finalise the settings on the clothing, or you can click on ‘Recalculate Occlusion’ to recalculate the occlusion.
Review
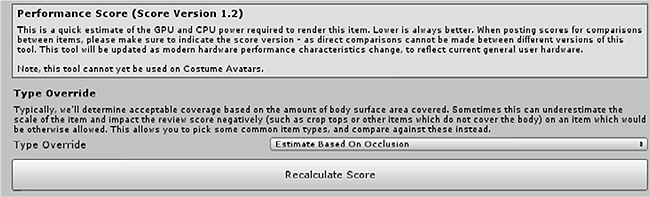
This is where you can see the performance score, which is a quick estimate of the GPU and CPU power required to render the item. You can also change the Type Override to see an estimate of GPU and CPU power for similar items such as shorts, dresses or jackets.
Once all of these settings have been set, you need to add the Virtual Good component to the clothing item to upload to sinespace.
| Content Creation Portal
|
|
|
| Common
|
|
|
|
| Vehicles
|
|
|
|
| Gestures
|
|
|
|
| Humanoid Animation
|
|
|
|
| Clothing
|
|
|
|
| Region Creation
|
|
|
|
| Quests
|
|
|
|
| Games
|
|
|
|
| General Info
|
|
|
|
| Customisable Regions
|
|
|
|
| Scripting
|
|
|
|
| Creator Support
|
|
|


